Paint Ceilings and Doors like a Professional
Does anyone ever intentionally set out to do a messy painting project? No! But, it seems to happen all too often. The solution?When planning your door or ceiling painting project, take some tips from the pros for a flawless, perfect finish. We’ve done the research for you, and we’ve organised the techniques that make professional painters so good at what they do when painting doors and ceilings. The following tips cover your painting project from the planning stage through to the picture-perfect finish. If there is something that we did not cover, please call Perth Renovation Co. at (08) 6245 1289 to chat with one of our friendly, professional staff members. We are always happy to help our neighbours get the results they want.
DOORS
First Things First:
- Select the colour and type of paint for your door. If the entire room is going to be painted, paint the walls and ceiling first so that you can select either a complimenting or contrasting door colour that will enhance the ambience of the whole room. Since you don’t want to overbuy the amount of paint needed, you can use the paint calculator at any paint or hardware store.
- Gather all of the materials needed for your paint project. They will include:
- Fine grit sandpaper
- Paint brushes with angled and flat surfaces
- Rollers and roller trays (if applicable)
- Bucket for holding the mixed paint
- Screwdriver for removing the hardware on the door
- Drop Cloth to cover the floor
- Sawhorses or sturdy, flat, raised surface to hold the door while painting
- Paint Stripper and Varnish Remover (if applicable)
- Putty Knife if using the paint stripper
- Primer paint (if applicable)
- Paint in the colours and textures selected for the door and the door frame
- Several damp rags or sponges for wiping away any dust, dirt, or fingerprints from the door before painting
- Putty, lightweight gyprock, putty, or plaster to repair dents, cracks, scratches.
Preparing the Work Area:
Before you think about applying the paint, you need to prepare the door for painting, and you need to prepare the area where the door will be painted. That means:
- Cover the area where the door will be painted with a drop cloth to protect the floor from any sandpaper, primer, or paint droppings.
- Place sawhorses or a raised, sturdy, flat table on the drop cloth to support the door while painting.
- Take the door down and place it on the raised surface where it will be painted. If you can’t take the door down, make sure that it is securely closed and will not move while being painted.
- Remove any hardware or hinges.
- Use painter’s tape to cover any hinges left on the door frame, and the outside edges of the door frame.
Preparing the Door:
- Wipe down the door with a damp rag or sponge to remove dust, dirt, and fingerprints.
- Inspect the door for scratches, dents, cracks, peeling old paint, or other imperfections that need fixing before painting. Fix any imperfections before applying the paint.
- Sanding off any old paint flakes, and smoothing down cracks or scratches, going with the grain of the wood, will let the paint adhere well and give you a professional starting point.
- Re-wipe the door to remove any dust from sanding or any remaining particles from other materials used to repair the door.
- If you are totally changing the colour shade already on the door, use a paint primer first. If you are repainting the door in the same colour family, you can use a paint that already has a primer included.
- If the door has window areas, put painter’s tape on the glass where it meets the door.
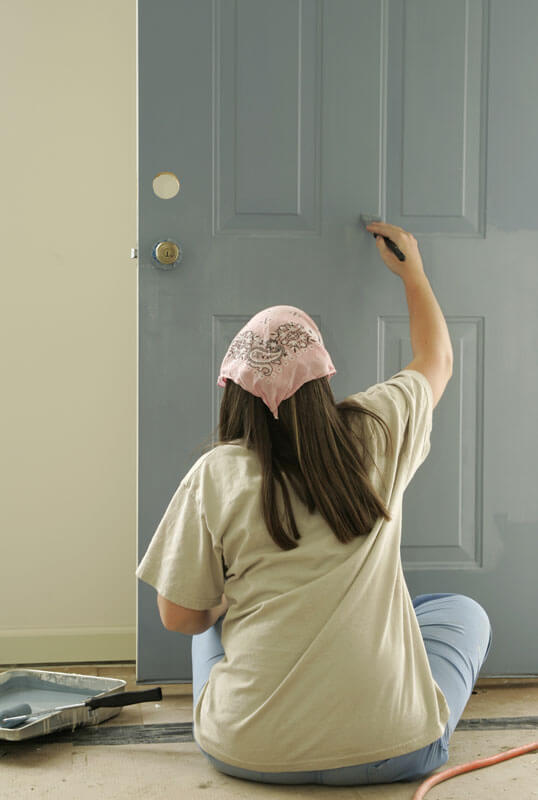
Painting the Door:
- Ensure that your paint is completely mixed by stirring it well before pouring a small amount into a paint tray.
- Use an angle brush to paint around the hinged area first. If the door has panels or windows, use the brush to apply paint in these areas.
- Use a paint roller for the flat surfaces of the door being careful around panelled or windowed areas. Painting the door in a W or M motion ensures an even application of the paint.
- Let the first layer of paint dry for 10 minutes before applying the second coat. If you see any paint bumps or bubbles in the first coat, lightly sand the area, and then put on the second coat in the same manner as the first coat.
- Final drying times depend on the type of paint used. Water-based paint requires two hours of drying time, water-based enamel paint requires four hours for drying, and oil-based enamel paint requires up to 16 hours to completely dry.
Painting the Door Frame:
While the door is drying, you can use the time to paint the door’s frame. Be sure to apply painter’s tape at the edge of the door frame where it meets the wall. Use a small, angled brush to paint the door frame. Allow the paint to dry before reattaching the door.
Final Step:
Reattach any old or new door hardware, reattach the door to its frame, and enjoy the freshly renewed appearance of your room.
CEILINGS
First Things First:
- Select the colour and type of paint for your ceiling. White is not the only colour required for a ceiling. You can create a new, dramatic look and feel of a room by painting the ceiling a soft, warm grey, blue, cream, or other colour that compliments the interior décor of the room. If the entire room is going to be painted, plan to paint the ceiling first so that no paint will drop or splatter on the walls. Since you don’t want to overbuy the amount of paint needed, you can use the paint calculator at any paint or hardware store.
- Gather all of the materials needed for your paint project. They will include:
- Fine grit sandpaper
- Paint brushes with angled and flat surfaces
- Rollers, roller poles, and roller trays (if applicable)
- Bucket for holding the mixed paint
- Drop Cloths to cover the floor or any furniture that cannot be moved
- Old rags to cover chandeliers or other lighting fixtures, ceiling fans, sconces, and cornices
- Sturdy step ladder with a fold out shelf to hold a paint roller tray
- Putty, lightweight gyprock, or plaster of Paris to repair dents, cracks, scratches
- Putty Knife to remove old paint flakes
- Primer paint (if applicable)
- Paint in the colours and textures selected for the ceiling and any sconces or cornices
- Several damp rags or sponges for wiping away any dust or dirt before painting
Preparing the Work Area:
Before you think about applying the paint, you need to prepare the ceiling for painting, and you need to prepare the work area below the ceiling. That means:
- Where able, remove any ceiling fixtures. If not able, cover ceiling fans, sconces, lighting fixtures, and cornices with rags, old cloth, or painter’s tape.
- Remove furnishings from under the ceiling and cover the floor with painting drop cloths. If some furnishings are too big or too heavy to move out of the room, cover them with drop cloths.
- Position the step ladder close to an edge of the ceiling.
- Wipe down the ceiling surface to remove any dust or cobwebs before painting.
- Sand down any old paint flakes, scratches, or minor cracks.
- Fill in any sizable cracks or dents before painting. Let it dry and then re-wipe the ceiling surface.
Painting the Ceiling:

- Ensure that your paint is completely mixed by stirring it well before pouring a small amount into a paint tray.
- Use an angled brush to paint along the edges of the ceiling above the cornices or sconces. Use the angled brush when painting around any light fixture still hanging from the ceiling.
- After you have angle painted about 10 cm of the ceiling edge, switch to the roller to paint the remaining surface of the ceiling. Be sure to tap the edges of the roller to eliminate any extra paint before using the roller. Continue with this application across the entire ceiling. If you choose to use an attached roller pole to paint the ceiling from the floor, apply the pain in small sections using a W or M approach to ensure an even application of the paint.
- Once you have painted half of the ceiling, go back over that section with a light application of paint. The reapplication of a first cost using a gentle rolling motion will remove any remaining paint drips while leaving the ceiling with a smooth, professional finish.
- After the entire ceiling has received the first coat of paint, allow the paint to dry for two hours. Then, complete the second coat of paint in the same manner as the first coat was applied.
- Final drying times depend on the type of paint used. Water-based paint requires two hours of drying time, water-based enamel paint requires four hours for drying, and oil-based enamel paint requires up to 16 hours to completely dry.
Final Step
Gently remove any painter’s tape from around cornices, sconces, ceiling fans, and lighting fixtures to ensure there is no paint removed with the tape. Replace any ceiling fixtures that were removed before painting and enjoy your beautifully renewed, professionally painted ceiling.
For more on renovation tips and hinds follow our Perth Renovations Co Blog or make an inquiry on our website. We make your renovation dreams a reality.


