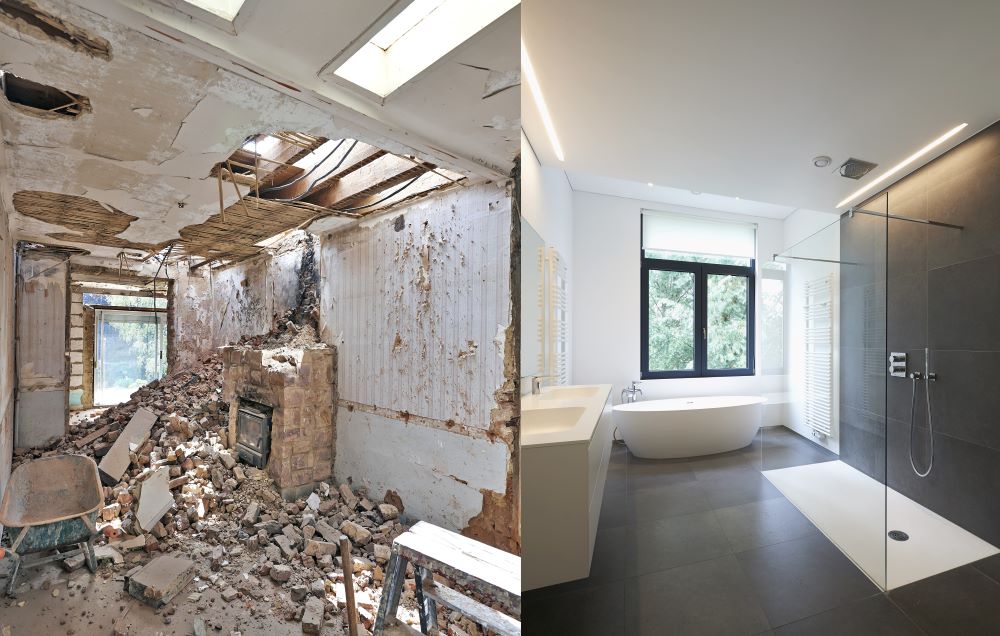
Is the outdated tile in the bathroom getting you down? Do you wish to exchange the tub for an open shower? At this point, you may already have a vision of how you want your bathroom to look. However, bathroom demolitions do not sound like something easy to do. Demolishing your existing bathroom is undoubtedly challenging, but it does not have to be a great challenge. With a good plan, the readiness to do some handiwork, and the proper guidance, you should be right on track.
Of course, DIY demolition will not provide you with the same results when you hire a pro. If you wish to save some bucks, though, doing it your own may be the solution you are looking for.
We’re here to walk you through the steps of bathroom demolition:
Phase 1: Preparation
Before you proceed to the main demolition task, you should first perform a few inspections and specific actions:
1. Make Sure Water and Electric Connections Are Turned Off
Your safety should be your main priority. You can hire a plumber and electrician to turn off your water and electricity, especially if you’re not confident with your knowledge in these two aspects.
It also helps to know where your service metres are, particularly your water metre. You could damage a pipe while demolishing the bathroom, causing water to flood your house. By knowing the water metre, you can immediately turn the water source off, which prevents even worse damage.
2. Know What’s Behind the Tiles
https://www.commerce.wa.gov.au/node/6022
You could have a hollow wall, characterised by a timber frame that has wall sheeting. If so, you should call a professional right away. You could be dealing with asbestos sheeting in your house. It is a common concern for many older homes. But even if your house is relatively new, you should still call a pro, such as an occupational hygienist to test the materials before you begin your work.
3. Determine if You Need to Repair Any Below-the-surface Damage
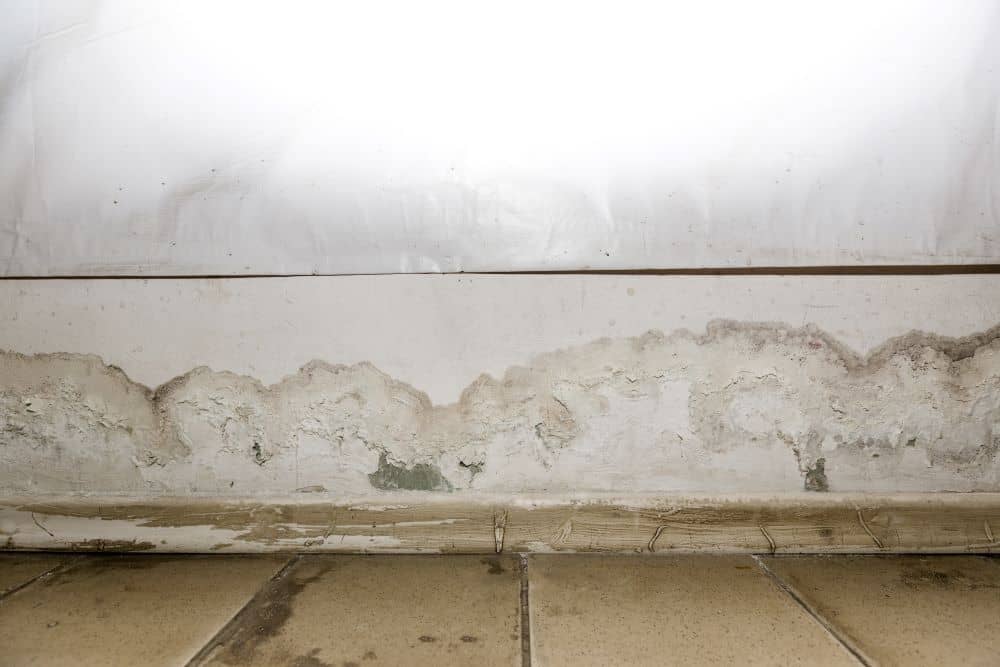 Often, homeowners do not know something requires repair until they rip everything out apart. Believe it or not, many bathrooms do not have proper waterproofing, which means water has continuously damaged the flooring over the years. As a result, the timber flooring under the tiles is rotten.
The same thing applies to those with paper-thin structural walls with a timber frame. It’s a recipe that termites love. If you have a similar case, you will have to replace and dispose of the damaged floors and walls. For expert tips on what type of bathroom flooring to choose, please read our blog post about this topic.
4. Be Prepared With a Cash Contingency Plan
You’ve done your homework, and you know how much you need to spend. But bathroom projects are typically unpredictable, specifically on the financial side. Therefore, you should have at least 10 to 15 per cent more funds to cover unforeseen expenses. For instance, if your demolition budget is $20,0000, you can add some extra grand (the more, the better) just to be safe.
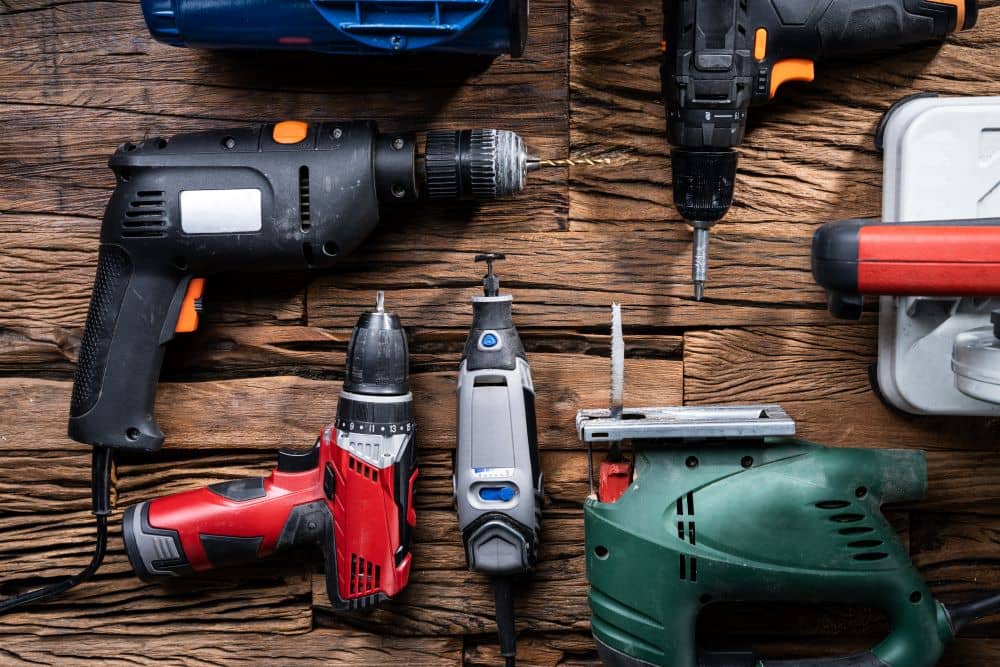
5. Have All the Materials and Tools Ready
Demolitions are unique, and the tools you may need may be different. However, some of the most common pieces of equipment that you should have ready in your arsenal are:
- Angle grinder

- Impact driver
- Various saw types, such as plaster and power saws
- Utility knife
- Different hammer types, such as a demolition hammer
- Tape measure
- Wheelbarrow
- Shovels
- Wrecking bars
- Drop sheets
- Ladder
Of course, don’t forget about your safety. Make sure that you wear safety glasses and gloves. When working with grinders and other noisy machines, be certain to use ear muffs.
You do need plenty of tools as you can see from the list above. You may even need more. If you don’t own most of them, it means you need to buy or rent them, which can be costlier than merely hiring a renovator. Make sure you decide wisely.
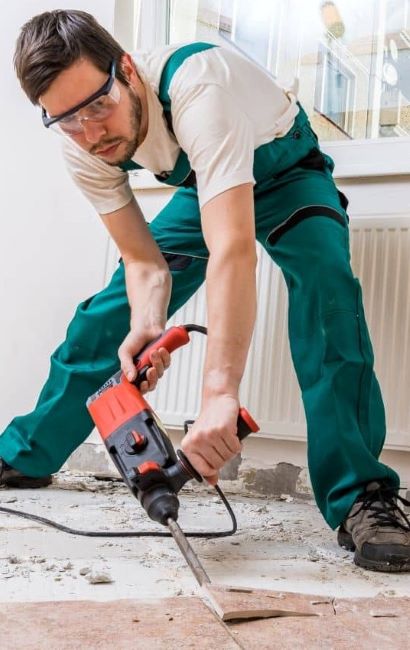
Phase 2: Removal
If you choose to carry out the bathroom demolition on your own, the next step is to gut the space.
Here is the order that you can follow in tearing up the facilities in the bathroom:
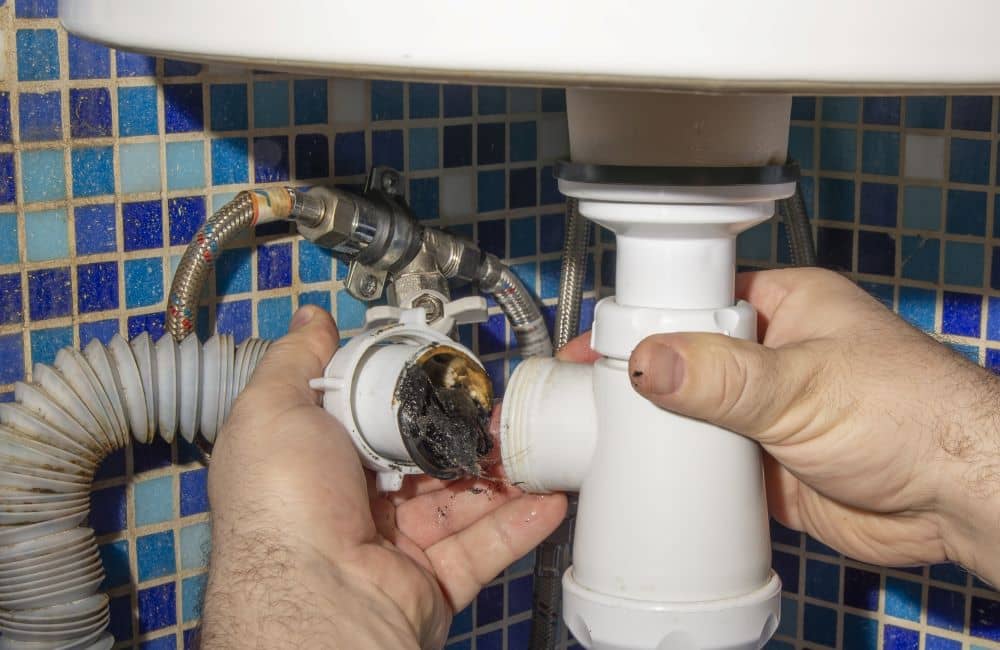
1. Sink and Vanity
The real demolition work starts here. You will usually just need an adjustable wrench, bucket, and a utility knife as you remove the bathroom vanity and sink. Use the bucket to catch the water that will start flowing from the drain trap. Position it under the sink drain. Then, use the wrench for unscrewing the nuts.
If you find the pipes running into the walls are already corroded, ensure that you have them replaced. Hire a plumber to install them for you. Create a plan, which should include having a buffer of about 10% or more of your renovation budget for unexpected costs, such as new pipe installations.
2. Toilet
Removing the toilet is not as complicated as it seems. However, it is more involved than tearing out your sink and vanity. You will need a utility knife and an adjustable wrench. If it has been a long time since you had your toilet installed, you may have to use a socket wrench and some WD-40.
Here are the steps for this process:
- Locate the threaded pipe or the inlet supply pipe. If you don’t know where it is, you can usually find it under the toilet tank.
- Unscrew the pipe and remove its connections from the tank and supply line valve. This valve is either on the wall behind your toilet or right on the floor.
- The next thing to do is to remove the tank from the toilet base. You can skip this step if your toilet is a one-piece model.
- Using your adjustable wrench, remove the nuts and bolts that connect the base of the toilet to the floor. Once again, if you haven’t done this in a long time, it may be hard to unscrew them. You can spray WD-40 and use a socket wrench for loosening the screws up.
- Use your utility knife if you need to cut through any caulking around the toilet base. Remove the toilet from the flange bolts.
- Proceed with the wax surrounding the drain flange on the floor. Scrape it away with your utility knife. Then, unscrew the flange.
There is a drain hole so you can stuff some rags in it to keep the bathroom from smelling bad with sewer gases.
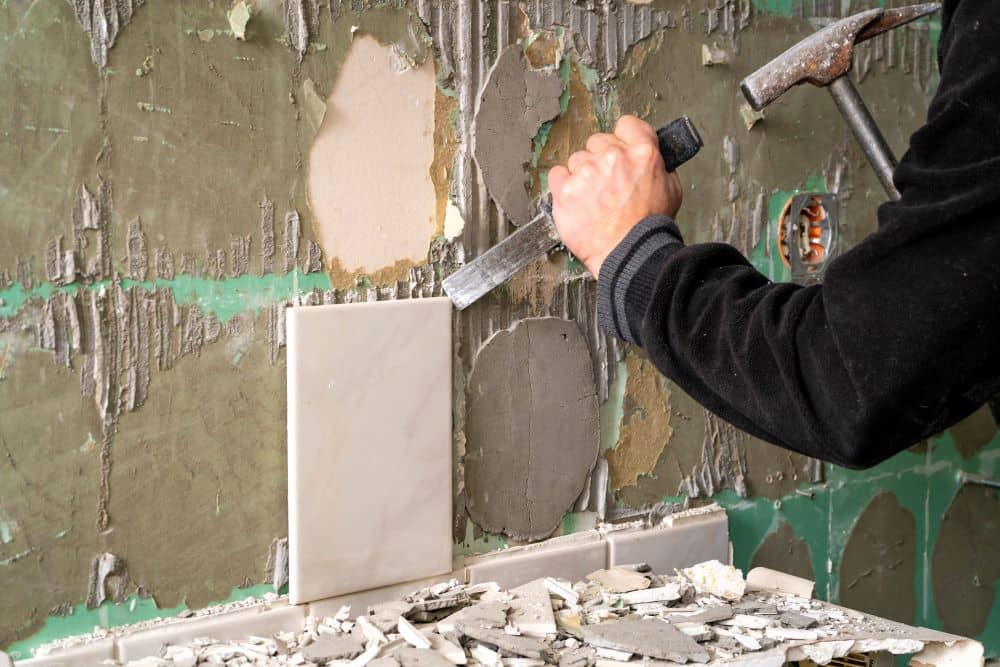
3. Tile
Now it is time to turn your attention to the tile removal, which is most definitely the most strenuous part of any bathroom demolition. It can take a full day for you to finish. The most important thing is that you do not rush the work into completion. But you can breathe a sigh of relief because this task is not difficult to understand. Also, it is a good idea to take breaks whenever you need to rest.
Before starting, protect the room using plastic sheeting. Cover the vents, door, and registers with the sheet. You will need the following materials:
- Hammer
- Chisel
- Reciprocating saw
- Pry bar
- Shop vacuum
Don’t forget your safety gear, such as work gloves, boots, face mask, and safety goggles. Wear appropriate clothing, as well, covering your arms and legs.
If you’re ready to begin, here are the steps to tile removal:
- Chip away the tile’s vertical line using the combination of a chisel and hammer. Start at the edge of the shower.
- Continue with the horizontal line along the top of the shower.
- Next step is to get your reciprocating saw and cut the exposed drywall. Be extra cautious since you should not cut into studs.
- Take your pry bar and insert it into the seams. Pry the sections of the tile and backing.
- Repeat the process for all the tiled parts of the bathroom.

Please always be safe. If your home was built in the early 1970s, perform a lead test first before any tile demolition. If you find that lead is present, you should have a pro over your house to do the removal for you. Protect yourself, especially if you have children in your home. The dust from the walls can be extremely dangerous.
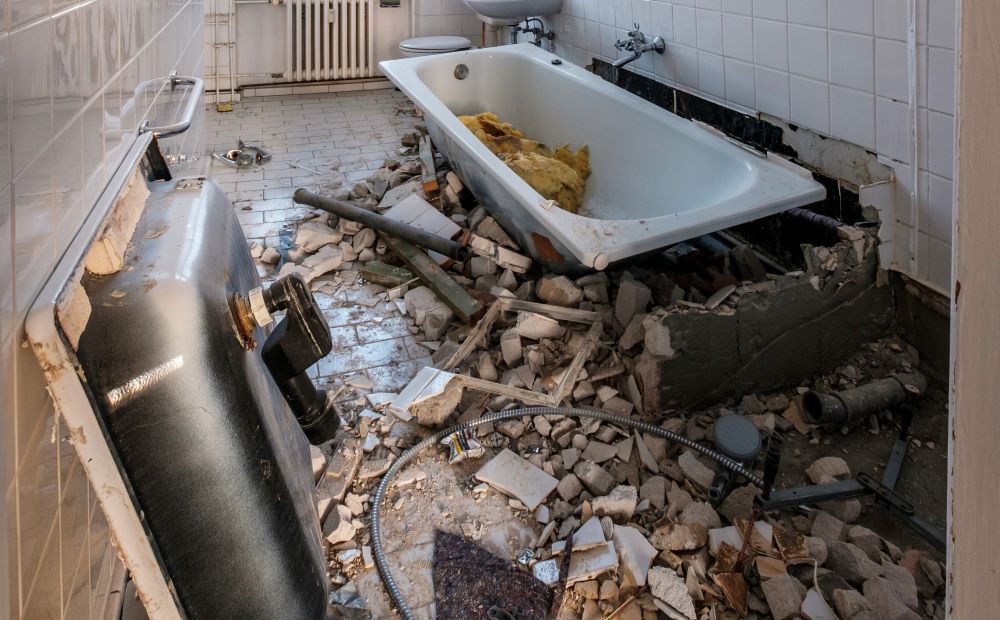
4. Bathtub or Shower
The final step in DIY bathroom demolition is to tear out your shower or bathtub. This job requires some heavy lifting, which means that you should have someone to help you out to complete it. Nevertheless, the whole task is quite simple, especially if you compare it with the tile removal. It should take just a few hours.
Let us first talk about removing a bathtub. You will need a utility knife, pry bar, and screwdriver. You will use two types of saws here, namely, the jigsaw, and drywall saw.
Before you get to work, it is essential to know what type of bathtub you have:
- If you have a cast iron tub, it is extremely heavy. You may need to use a sledgehammer to break it and have it removed a few pieces at a time.
- For tubs made from composite, steel, fibreglass, and similar materials, you can remove and carry them with the help of a family member or friend.
With that out of the way, let’s begin the work:
- Take your drywall saw and cut the drywall around the tub. If it already came down when you removed the tile in this area, you can skip this step. Once again, avoid cutting into studs.
- Unscrew the screws using your screwdriver.
- Use your utility knife to cut through the caulking between the floor and the bathtub.
- Use your pry bars to pry the tub away from the wall.
- Take your jigsaw and cut the tub if it will not fit your doors in one piece. You can, of course, skip this step if your door is big enough for the tub. Cutting, however, can make it easier to carry the tub out of the room.
Once you have removed the drain and the tub is a few centimetres away from the wall, you should already have a clear plan on how you will remove the tub. Remove all obstacles and any furniture – even the doors. That way, the tub will not scratch or damage any part of the house.
If you don’t have a tub, you will still have to remove the shower. The process is not as difficult as removing the tub and does not involve any heavy lifting. However, you will need more tools, including your wrench, pliers, pry bars, screwdrivers, hammer, and either a jigsaw or replicating saw. It is a messy job, so be prepared:
- Remove the hinges on the shower door using a screwdriver. Place the door aside in a safe place.
- Pry out the fasteners holding the door frame and remove the bracket. You probably require a utility knife here to cut through the caulk.
- The next step is to detach the showerhead, arm, and other parts of the shower. Make sure that you also remove the levers or knobs, drain covers, towel racks, and soap holders.
- It is time to use the saw that you have (either a jig or reciprocating saw) and cut the shower walls into pieces. If you have tile showers, use a pry bar to pry off the tile rows. It will allow you to cut the walls in half more manageably. Meanwhile, if you have fibreglass showers, you can cut the walls at the corner and base.
- Loosen the shower floor by prying before you remove it carefully.
And the hard work of bathroom demolition is complete!
You can go for a walk, have something to eat, or take a nap. When you wake up from your peaceful slumber, don’t forget to turn the water back on. Surely, you do not plan to finish the job with a demolished bathroom. It’s usually just the first of many procedures if you’re planning to renovate your bathroom. We highly recommend that you do not renovate your bathroom on your own. It would be best if you had the insight and guidance of professionals.
Bathroom remodels, and renovations can look straightforward, but they are intensive projects that require a keen eye for detail. Bath and shower conversions, fixture installations, replacements, and reconstruction are all expensive. However, mistakes are costlier. You want a high-quality result that improves the quality and convenience of your bathroom. That’s precisely what Perth Renovations Co can give you.
Contact us today to start your journey to a better and more efficient bathroom.


