The Comprehensive Guide on How to Change Out a Tap
There are a number of good reasons why you should change your tap. It extends far behind kitchen & bathroom design and aesthetics.
Perhaps the tap is no longer working properly, causing leakage. You could be in the middle of the kitchen or bathroom remodel.
In this case, you want the tap to match the renovation design that you are going for.
The good news is that changing or even fixing a tap is not that difficult.
Your hands might get a little dirty but having the complete tools and knowledge will let you get in the right track and prevent you from having any home renovation disasters.
As they say in the renovation game: “planning gets results”.
Why You Should Change Your Old Tap
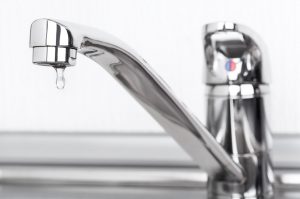
 The biggest giveaway that your tap needs replacement is it is constantly dripping. There are other reasons why the tap is dripping, such as high water pressure in the pipes. You could also have malfunctioning valves. You may want to check if you have any of these plumbing problems first. You probably require the assistance of a professional plumber.
Similarly, if you notice water damage at the bottom of the tap or under the sink, you need to fix the tap right away. With the rising costs of water bills in Australia, it is a must that you prevent any leak. In 2017, a warning was sent out to residents regarding the possibility of water costs doubling by 2040.
While there are currently no restrictions in Brisbane and Darwin, other areas have a different situation. In Sydney, for instance, a level 1 water restriction has been placed until further notice. Meanwhile, Permanent Water Efficiency Measures or PWEMs were implemented in Perth and the rest of Western Australia since 2007.
Every year, there are sprinkler water bans at specific periods to facilitate water conservation in the city. Australia is considered the driest continent in the world. You can do your part to save the area and the planet as well by fixing your tap. Other reasons why you should look into changing your kitchen tap today include:
- There are damaged components, such as the handle, which may no longer work.
- The tap does not provide a nice gush of water. It may be a sign that you have a clogged tap aerator.
- When you open the tap, you hear a certain sound. They are usually high-pitched noises, indicating a serious problem. Screeching sounds typically mean that you should replace the rubber washer. Sometimes, clicking sounds can be heard. If it is your case, you may have to take the tap apart and check if there are cracks. An easier solution is to replace it.
- Rust is one of the most common reasons why kitchen taps start to fail. If you notice mineral deposits or corroded areas, you should replace the tap immediately.
- If the handle squeaks, the stem of the tap may have worn down. Taps that have been around for several years face this problem. Replacing the tap or protecting the handle stem with coat will solve the problem.
An easy way to tell if you have a water leak problem is to check the water meter. Knowing how to read the water meter of your property can be truly helpful at this point.
Here are the steps if you wish to learn how to read the meter:
- Locate the water meter, which is typically at the front in most properties.
- Water meters are different from one another. However, you should see two groups of numbers in black and red.
- The numbers in black, which typically consists of four numbers, represent kilolitres.
- The second group consists of three numbers in red. They represent individual litres.
- If you see four digits in the red group, you have an older meter. This fourth number represents a tenth of a litre.
- Track your water consumption by jotting down all the digits that you see.
You can test if the reading is accurate by turning off all the taps in your property. Then, take a look at the red numbers in the water meter. Next is to get a 10-litre bucket and fill it up. Once again, make sure that no other taps are flowing while you do this test. Check the meter and it should now have an additional 10 litres.
As you keep an eye on your water usage, you will notice that the digits in the water meter still go up even when no tap is being used. Also, you should see that the leak indicator in the water meter is moving. Depending on the brand of the water reader, the indicator may be a tiny triangular shaped gauge. Others use a silver wheel, which rotates when water is flowing.
Another test is to turn off all taps and check back after one or two hours. If the digits remained the same, you do not have a leak. Otherwise, it is time to change the faulty tap.
What You Need to Know About Kitchen Taps
Before you start, there are many important things about taps that you should know. Taps, whether used in the kitchen or bathroom, are among the most common fixtures found in every home. Every day, people use taps for a variety of activities, including washing their hands. For this reason, it is essential that you understand more about your kitchen or bathroom tap before you jump into replacing it.
Kitchen vs Bathroom Taps
There is not much of a mind-blowing difference between a kitchen and a bathroom tap. However, it is quite common to find taps that are specifically for kitchen sinks and others for the bathroom. Many kitchen taps come with features that you may not find in any bathroom tap. Some examples are those that come with a swivel spout and spray hoses attached.
Since there is no kitchen or bathroom design rule, most of the taps, even those that are labelled as such, can still be used in the bathroom. However, to use a kitchen tap in the bathroom, it is important to find one that physically matches the sink. You can still utilise the tap even if the two do not match but you may have to modify the sink. Clearly, it is not a practical idea for most people.
Kitchen taps can either have a single or double handle. It will depend on the valve mechanism within its system. If you have a single-handle tap, its supply tube is connected to the tap right at the base of the opening or spout. Installing the tap means that you will feed these two tubes through a hole at the centre of the kitchen sink.
Meanwhile, a double-handle tap often has its supply tube connected directly to the handles. You can find kitchen taps with flexible hoses, which have their handles linked to the spout.
For a bathroom tap, especially for the bathroom sink, there are different shapes and materials used. Some prefer plastic, while others use porcelain or meal. Bathroom sinks can have one main hole for installing single-handle taps. However, if you have a sink with no holes, you will need to make your own.
One notable difference between a bathroom and a kitchen tap involves the basin. A bathroom sink has a smaller rim compared to the kitchen sink. Therefore, a bigger kitchen tap cannot be used. Bathroom sinks also have back rims that curve to complement the contours of the sink.
If you plan to use a kitchen tap for the bathroom sink (or vice versa), there are a few considerations to make. The tap should fit the sink, which will heavily depend on the type of tap you have. Its shape will also determine whether or not you can use it. Check if the holes on the sink match the tap’s hole spacing as well before you install.
Taps will not work if you have a single handle with a rigid base and incorrect shape, even if the hole spacing is appropriate. The same goes with double-handle taps with a rigid base and your porcelain sink has pre-made holes.
Frequently, most of the kitchen taps that work well in the bathroom are those single-handle models. Make sure though that the one you purchase has a small base. On the other hand, if you have a double-handle model, it should have a flexible hose to link its handles to the spout.
Tap Types in Australia
When you are out to purchase a new tap for your kitchen or bathroom, you will discover numerous options available. The most common types include:
- Deck mounted: This type is attached to the basin or bathroom sink with tap holes in the rim. You probably have this type in your home because it is the most common. Many plumbers prefer deck mounted taps since they offer easy access. Plus, the pipes allow the water to flow right into the basin.
- Wall mounted: As the name suggests, this type is mounted to the wall. You will only have to reach out to it to fill the basin, tub, or any container. It has a modern design and is preferred by homeowners because the style is easy to clean. However, repairs are difficult since the plumbing is concealed inside the wall.
- Bath mixer: This type is typically found in the bathroom and is used to fill the bath. It is also a common type of tap for showers. However, it is not ideal for basins.
- Pillar: A traditional style with hot and cold options, this type has two separate taps for each temperature.
- Monobloc: This type of tap works just like mixer taps, especially when it comes to storing hot and cold water within the tap. However, only one handle controls the temperature, as well as its flow. The type of tap is also determined by its mechanism. Some taps are washer types, which is common among pillar taps. You will have to twist the handle so the washer goes up and down, controlling the flow of water. Another mechanism is disc tap, which is common in monobloc type of taps. It comes with two discs inside and both discs have one hole each to let water pass through.
Things to Consider When Buying a New Tap
Shopping for something as simple as a kitchen or bathroom tap can quickly confuse you. There are numerous options with different types and technologies involved. You can go for a traditional or modern look but the style is not the only thing to consider. Here are the other factors that can affect your buying decision:
- Body: The kitchen sink will determine the body of the tap to look for. Sinks have either one or two pre-drilled holes, so ensure that you buy one that matches the sink. Monobloc and one-handle taps are the most common choices for a single tap hole. Meanwhile, if you have two tap holes, pillar and mixer taps are a good option.
- Spout: When buying, look at the spout of the tap, particularly its size, shape, and position. Some spouts also swivel, letting you rotate it for ease of use in the kitchen.
- Features: Another consideration involves the features of the tap. Check the finish and make sure it is suitable for your sink and the entire kitchen. The handle is also worth looking into. If you have a busy kitchen, a lever handle is a good option. Some taps are also water-efficient and some come with extra features, such as generating steaming hot water.
The price should also be considered. You want to stay in your budget when it comes to taps. However, since kitchen and bathroom taps are used frequently on a daily basis, it should be made of high-quality materials. Cheap taps let you save but superior quality products are worth the investment since they last longer.
Replacing Old or Broken Tap
The reason why people choose to DIY the installation of a new tap is to save money. The amount you will shell out will depend on many factors, including the type of tap you go for. The condition of your current tap also affects the total cost, as well as your vanity, bench or sink. You could spend about $350+ on average. However, if the tap and sink do not have any issues, the cost of DIY can be around $245 or less.
To begin the replacement process, you should prepare the needed tools first:
- Wrench or shifter
- Flathead screwdriver
- Philips head screwdriver
- Multi-grips
Other tools that may come in handy are water pump pliers, ratchet, pipe cutter, hacksaw, limescale remover, and compression fittings. Also, be ready with a bucket, masking tape, old towel, and thread seal tape.
When you are ready to start, make sure that you turn off the water supply first. Then, turn on the tap that you will replace. Let the residual water run for a few, which should usually stop after a minute or two. You can then proceed with the following steps:
- Dismantle the kitchen or bathroom tap – The dismantling method will depend on the type of tap you have. Be patient and discover which should be undone first. In most cases, you will need to locate a small nut or screw. Then, you continue with the flanges and plates.
If the tap is very old, you may need to get assistance from a plumber to get the tapware off. Nevertheless, there should be no problems even when there is a small breakage. This video will guide you on how to remove the tap. - Make sure the tap is compatible before installation – Once you have removed the old tap, clean the area and keep it as dry as possible. Compare the old and new taps. They do not have to have the same features and appearance but they should be similar in design and function. If the tap is not compatible with your sink, you end up wasting your effort and money. Therefore, it is crucial that you have the correct tap before you proceed.
- Cover the sinkhole – Use a cloth or old towel to cover the sink so you do not end up with a blocked sink drain.
- Make the replacement – When the tap is dismantled, the next step is to find the washer, jumper valve, and O-ring. Replace them with new ones. You may have to use pliers or tweezers since it can be difficult to reach them with your hand. You will need to apply grease to the thread so that it will function smoothly. Also, it will help lengthen the life of the tap.
Sometimes, the jumper valves are attached to the washers, so you may have to replace them together. Domestic taps generally measure 12mm diameter but there are some with at least 15mm in size. If your old tap has a shroud, you can use silicone to reseal the area, which helps in avoiding mould growth.
Reassemble The Tap
You will then have to reassemble the tap just like how you disassembled it, only this time, you do it in reverse. Put the washer and the valve back. Then, attach the tap bonnet tightly using the wrench. Lock the tap first before opening the water.
The final step is to test if you did a great DIY job. Turn the water supply back on and rotate the tap head. It should no longer be leaking, which means you have accomplished your task.


